How to set up a proxy in Chrome and Firefox
A browser proxy needs a server address, port, protocol, and sometimes a username and password. A correct proxy setup Chrome process usually takes five to seven steps: add the values, save them, restart the browser, and verify the visible IP. Chrome uses system controls, while Firefox also offers its own network panel.
What you need before setup
Prepare every access value before opening browser controls. A clean proxy setup Chrome workflow starts with exact credentials and a supported endpoint.
✅ Checklist:
- Server IP or hostname
- Port
- Username and password
- HTTP, HTTPS, or SOCKS5
- Required US location
Keep these details private. A residential proxy is for lawful US work.
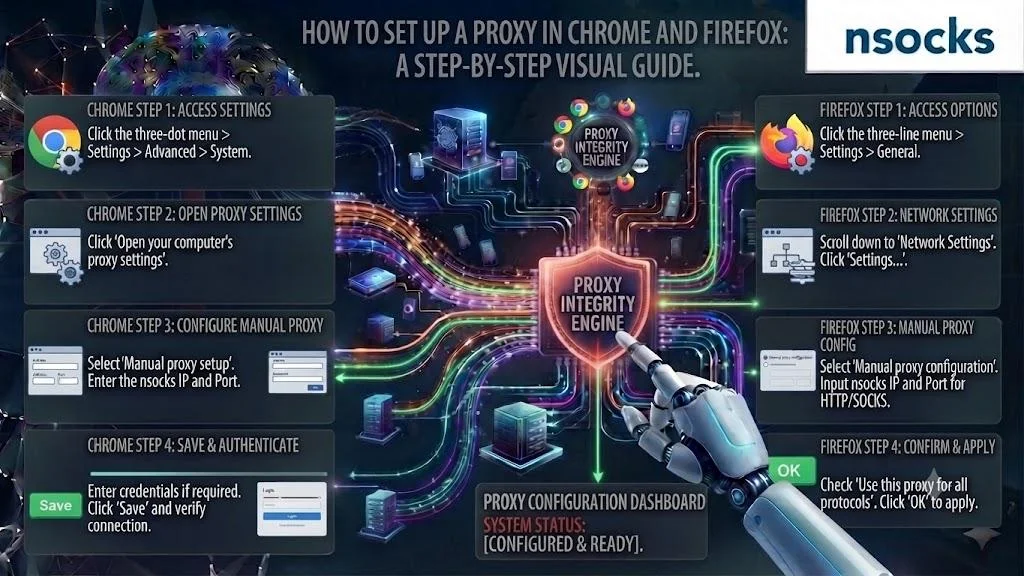
How to set up a proxy in Chrome step by step
Chrome normally opens the operating system network panel. Users learning how to set proxy in Chrome should edit the active system connection.
- Step 1: Open Chrome Settings.
- Step 2: Search for proxy.
- Step 3: Open system controls.
- Step 4: Enable manual setup.
- Step 5: Enter server and port.
- Step 6: Save and restart Chrome.
- Step 7: Check the public IP.
Change one network tool at a time.
How to set up a proxy in Firefox step by step
Firefox can route browser traffic without changing other apps. The Firefox proxy settings panel supports manual HTTP values and SOCKS5 access.
- Step 1: Open Settings.
- Step 2: Choose General.
- Step 3: Find Network Settings.
- Step 4: Click Settings.
- Step 5: Select Manual configuration.
- Step 6: Add host and port.
- Step 7: Choose SOCKS v5 if needed.
- Step 8: Save and reload.
This setup suits approved QA and geo targeting.
How to add authentication
Authentication proves that the browser may use the endpoint. During proxy setup Chrome, the prompt usually appears after the first request.
- Step 1: Save host and port.
- Step 2: Open a website.
- Step 3: Enter the assigned login.
- Step 4: Confirm and reload.
- Step 5: Clear old credentials if prompts repeat.
Use the current dashboard details.
How to enable remote DNS in Firefox
Remote name resolution sends domain lookups through the selected SOCKS route. Review Firefox proxy settings and enable remote DNS only when supported.
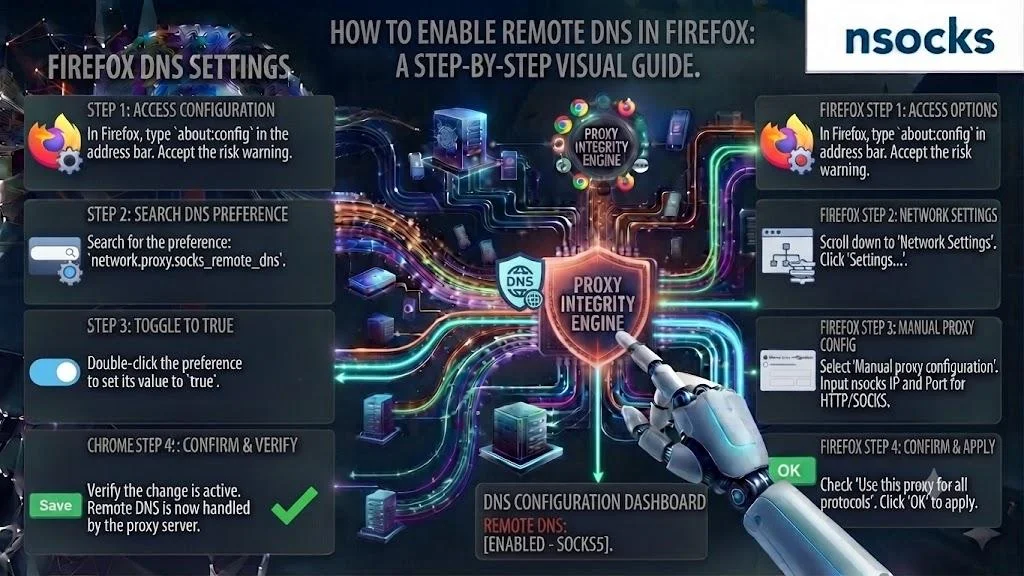
💡 This can reduce a DNS leak during testing. After saving, review DNS settings and compare the resolver with the selected region.
How to use a proxy extension
An extension helps switch profiles inside one browser. It can simplify how to set proxy in Chrome, but only when the add-on is trusted, current, and clear about the active route.
Avoid unknown extensions that store shared credentials.
How to verify the proxy works
Verification should confirm the address, location, speed, and login behavior. A proxy setup Chrome check matters after system updates or credential renewal.
| What to check | Expected result |
|---|---|
| Public IP | Different from original |
| US location | Matches the endpoint |
| Page loading | No repeated errors |
| Login | Appears once if required |
| DNS | Matches the route |
Run a connection test twice. Repeat to confirm stability.
How to turn the proxy off
Turning the proxy off should restore the normal route. Users following how to set proxy in Chrome must disable manual system routing, while Firefox users can select No proxy.
- Step 1: Open the same panel.
- Step 2: Disable manual routing.
- Step 3: Save the change.
- Step 4: Restart the browser.
- Step 5: Check the public IP.
Common issues and fixes
Most failures come from wrong values, old credentials, an unsupported protocol, or an inactive endpoint. A careful proxy setup Chrome review changes one setting per test.
❌ Warning signs:
- No pages load
- Login prompts repeat
- The original IP remains
- The route disconnects
Write down the error. Retest after each change.
| Issue | Cause | Fix |
|---|---|---|
| No connection | Wrong host or port | Copy values again |
| Login loop | Old credentials | Refresh the login |
| Same IP | Inactive route | Reopen controls |
| Slow pages | Distant endpoint | Choose a closer region |
| DNS mismatch | Local resolver | Review DNS options |
How proxies work in browsers
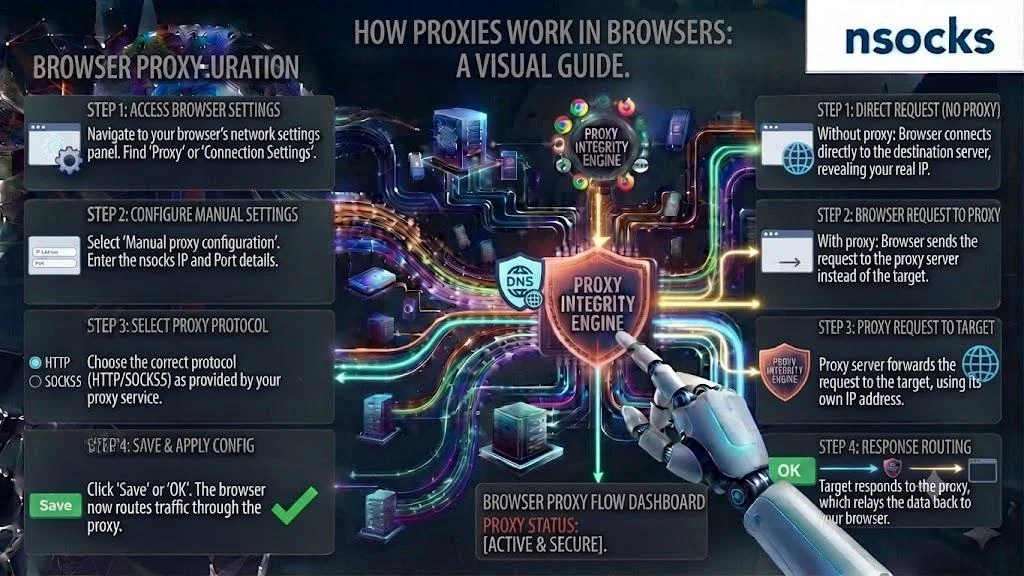
A browser sends selected requests through an intermediary endpoint, which contacts the destination and returns the response. The Firefox proxy settings model offers browser-level control, while Chrome follows system controls.
| Feature | Benefit |
|---|---|
| Browser routing | Other apps stay unchanged |
| Protocol choice | Better compatibility |
| US locations | Local QA |
| Stable credentials | Fewer errors |
| Dashboard access | Easier management |
Nsocks supports lawful business testing and localized reviews, helping teams manage multiple profiles, verify regional results, and keep proxy workflows organized within clear $ budgets.
Key takeaways
A good proxy setup Chrome routine handles credentials, routing, and verification in order. Records make troubleshooting faster.
- Chrome usually follows system controls.
- Firefox offers browser controls.
- Verify IP, location, DNS, and speed.
- Keep credentials private.
- Use proxies only for lawful work.
Frequently asked questions
How do I set up a proxy in Chrome?
Open Chrome Settings, search for proxy, and enter the assigned values in the operating system panel.
Does Firefox have its own proxy settings?
Yes. Firefox includes a Network Settings panel for manual HTTP and SOCKS configurations.
How do I add a login and password to a browser proxy?
Save the server and port, open a website, and enter the credentials when prompted.
What is Remote DNS in Firefox?
It sends domain lookups through the selected SOCKS route instead of the local resolver.
Why is my browser proxy not working?
Check the host, port, protocol, credentials, endpoint, firewall, and local network.